Topic starter
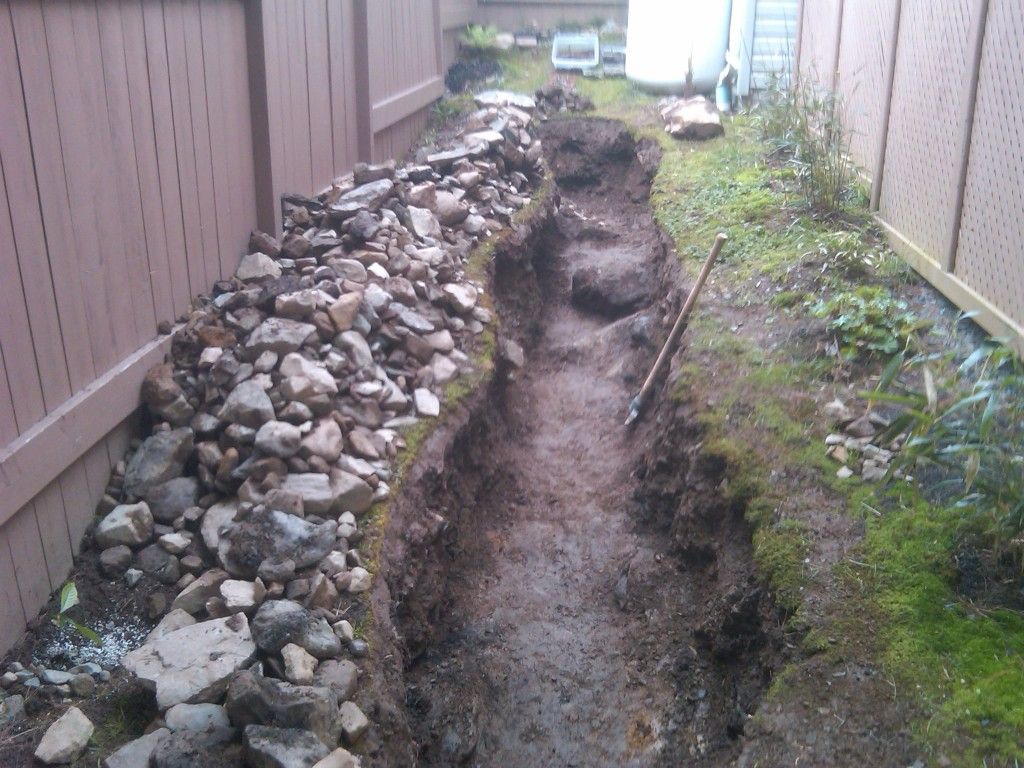
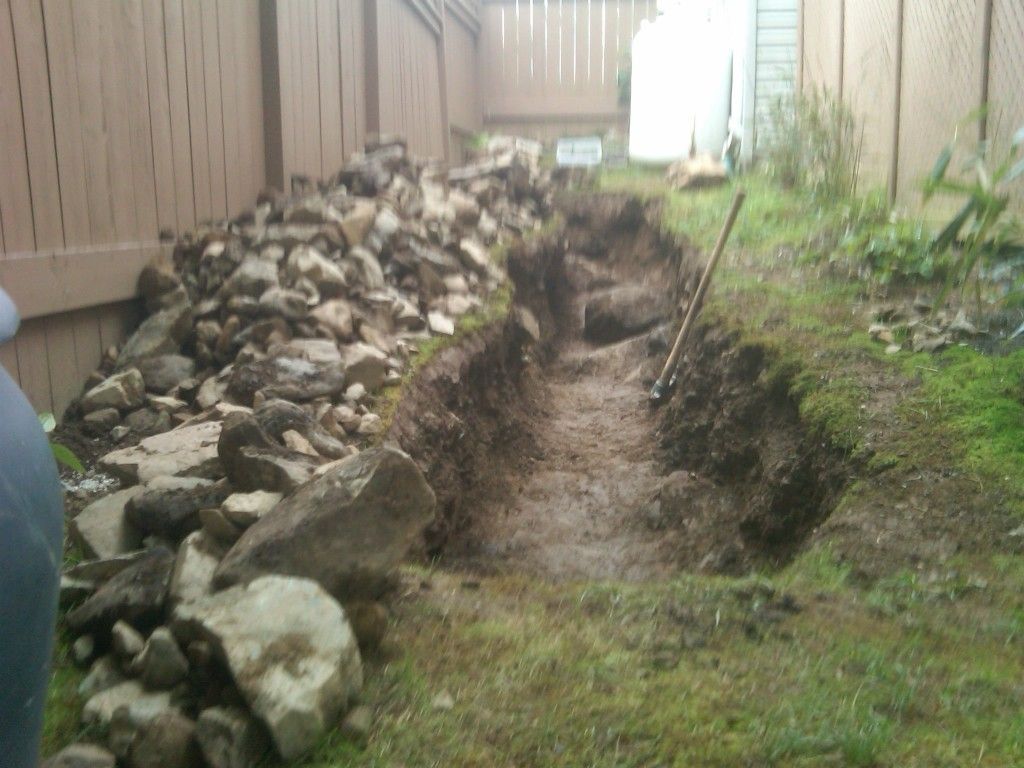
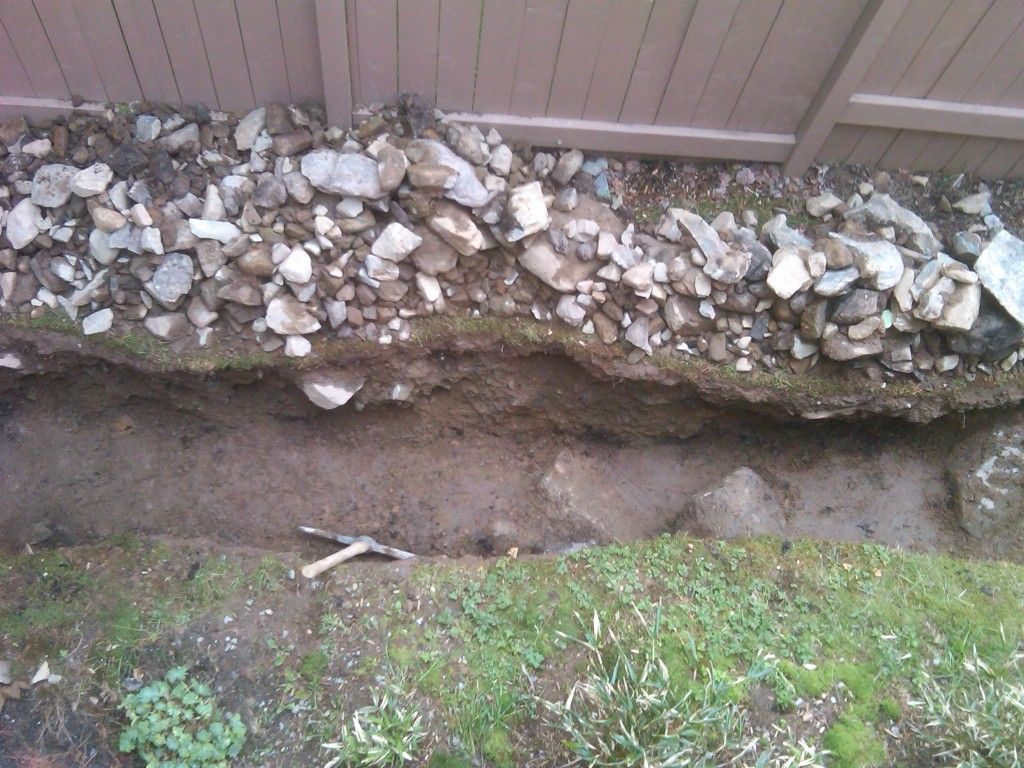
I managed to finish digging the bed today. It has been raining on and off here for the past week or so, so not a lot of progress could be made. One upside was that I was able to see where any water was pooling, and increase the slope accordingly. The minimum depth is 2', with a large portion of the bed being 2.5' deep. There were some large boulders towards the end of the bed which were simply too big to remove (250+ lbs?). I would guess that the largest rock I removed from the area was somewhere around 150 lbs.
I have read that it's a good idea to line the bed with some type of barrier in order to keep roots/weeds from growing through the sides. For me this will be especially important, as I have some bamboo relatively close to the area. I have a fair amount of 6 mil plastic sheeting which I'm going to use. Should I simply line the sides and not the bottom of the bed, or should I line the entire thing? I think plastic sheeting through the whole bed (including the bottom) would trap water at the bottom!! Paul/Jim/Tim, do you guys have any advice here? 😆
<img src="http://weathersticker.wunderground.com/weathersticker/big2_both_cond/language/www/global/stations/71601.gif" alt="Click for Shearwater, Nova Scotia Forecast" border="0" height="60" width="468" />
Posted : 31/05/2012 4:23 pm
I have rock pile along the sides of my cactus bed. Once a year I do have to go around and remove all of the grass that has invaded this border. I also plant sempervivums around the edge to prevent the grass from entering... I don't know if this works.
A picture:
<a href=" http://home-and-garden.webshots.com/photo/2976075770072511707swTVD M"><img src="  " alt="DSC02957"></a>
Posted : 31/05/2012 11:33 pm
Hi Cameron
I wouldn't line the sides with plastic........just my preference. I think bamboo will still go right through plastic. I used aluminum 'flashing' around my bamboo and it still made it past it. There's no stopping bamboo! 😉
<a href="http://www.wunderground.com/US/MA/Seekonk.html?bannertypeclick=bigwx"><img src="http://weathersticker.wunderground.com/weathersticker/bigwx_both_cond/language/www/US/MA/Seekonk.gif" alt="Click for Seekonk, Massachusetts Forecast" border="0" height="60" width="468" />
Posted : 01/06/2012 7:42 pm
IF you do use barrier, make sure its the thickest you can buy. I think the recommended thickness is almsot a 1/8th inch thich. It needs to be at least 3 feet down, there needs to be an inch sticking up above the soil line. Make sure the barrier is angled. The bottom should be closest to the bamboo, while the top should be away. This usually drives the rhizomes up.
The next thing you can do, is take a sharp spade or shaping shovel, and walk along the ends of the bamboo/cacti bed, and stick the shovel down as far it will go, and walk along the perimiter. THis should sever most adventerous roots.
The thing is too, bamboo doesnt like super dry packed soil. IF there is loose moist soil next to the dry packed soil, the roots will usually stick to the better soil. Thats how some people in Arizona get away with it - to damn dry and hot, and hard packed soil.
You could line the rocks with "hens n chicks", and sedium. They should fill in the cracks of the rocks and not let any grass in. You could probably do the same with lower growing cacti, like cholla or the native ontario opuntia. Basically, if you plant up the cracks, the unwanted plants wont have as much of a chance to fill them in.
"The definition of insanity, is doing the same thing over and over, and expecting different results" - einstien
Check out my new Blog! http://canadianplant.wordpress.com/
<a href="http://www.wunderground.com/global/stations/71749.html?bannertypeclick=big2"><img src="http://weathersticker.wunderground.com/weathersticker/big2_cond/language/www/global/stations/71749.gif" alt="Click for Thunder Bay, Ontario Forecast" border="0" height="60" width="468" /></a>
Posted : 02/06/2012 12:45 am
Topic starter
Thanks for the advice, guys! 😀
<img src="http://weathersticker.wunderground.com/weathersticker/big2_both_cond/language/www/global/stations/71601.gif" alt="Click for Shearwater, Nova Scotia Forecast" border="0" height="60" width="468" />
Posted : 03/06/2012 2:11 pm
Topic starter
A bit of progress on the bed (taken last week). There is still a lot to do: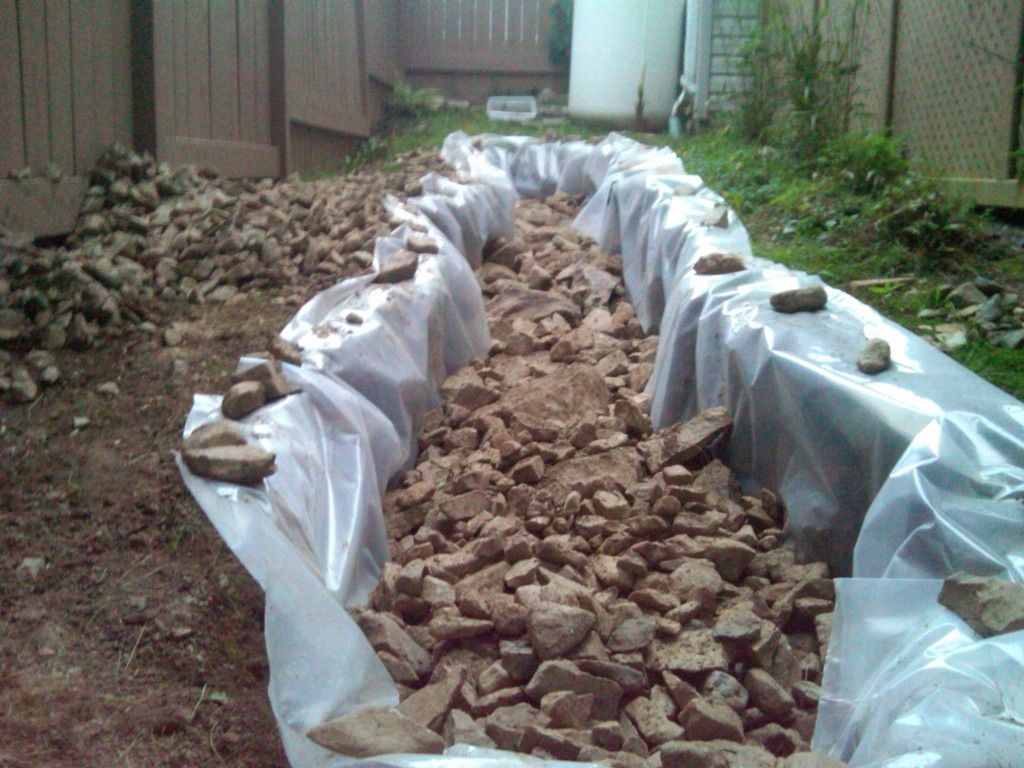
<img src="http://weathersticker.wunderground.com/weathersticker/big2_both_cond/language/www/global/stations/71601.gif" alt="Click for Shearwater, Nova Scotia Forecast" border="0" height="60" width="468" />
Posted : 29/06/2012 6:21 pm
Looking good Cameron! Today is suppose to get into the 90's F here. Is the heat making it up to your area?
<a href="http://www.wunderground.com/US/MA/Seekonk.html?bannertypeclick=bigwx"><img src="http://weathersticker.wunderground.com/weathersticker/bigwx_both_cond/language/www/US/MA/Seekonk.gif" alt="Click for Seekonk, Massachusetts Forecast" border="0" height="60" width="468" />
Posted : 30/06/2012 3:31 am
Topic starter
Thanks, Tim. NS has been feeling the heat as well. My coastal location hit 32 C (90 F) today, which was nice! 😆
<img src="http://weathersticker.wunderground.com/weathersticker/big2_both_cond/language/www/global/stations/71601.gif" alt="Click for Shearwater, Nova Scotia Forecast" border="0" height="60" width="468" />
Posted : 30/06/2012 4:12 pm
did you ever finish the cactus bed Id like to see some pics for all that effort
Posted : 15/06/2013 10:28 am
Topic starter
Mike, this is still a work in progress 😆 . It will definitely be finished by the end of the summer though!
Most of the work so far has been to simply get the bed back to the state it was in last summer. Over the winter, the rocks settled and compacted, and are now quite few inches lower than in the last photo. As well, parts of the edge of the bed collapsed, so I had to rebuild those.
The lower half of the bed receives less sun than the upper half, so I decided that I'm going to devote the lower half to other plants needing great drainage (likely A. araucana). I'm going to keep the upper half as a cacti bed, and will try to plant every species of native Canadian cacti, as well as the lone native Canadian Yucca, Y. glauca. I'll keep posting photos as the work progresses!
<img src="http://weathersticker.wunderground.com/weathersticker/big2_both_cond/language/www/global/stations/71601.gif" alt="Click for Shearwater, Nova Scotia Forecast" border="0" height="60" width="468" />
Posted : 26/06/2013 10:49 am
Topic starter
I did end up finishing this bed (except for planting the cacti), and I'll make sure to post some pics soon.
<img src="http://weathersticker.wunderground.com/weathersticker/big2_both_cond/language/www/global/stations/71601.gif" alt="Click for Shearwater, Nova Scotia Forecast" border="0" height="60" width="468" />
Posted : 01/12/2013 6:19 pm
I was just thinking...looking at these pics again,that it would have
been cool to make that into a Koi pond,probably need to be lower
at the high end and deeper downhill if it isn't to steep but it would
be cool to have a big water feature with tropicals around it-if this was
my house I would have done some kind of water garden with fish
and what not...will be interesting to see how this turns out 😛
<img src="http://weathersticker.wunderground.com/weathersticker/big2_cond/language/www/US/IA/Fairfield.gif" alt="Click for Fairfield, Iowa Forecast" border="0" height="60" width="468" />
Posted : 02/12/2013 3:56 am
Hi Cameron
keep the updates coming! PS how are the Loquats, Citrus and Eucs fairing?
<a href="http://www.wunderground.com/US/MA/Seekonk.html?bannertypeclick=bigwx"><img src="http://weathersticker.wunderground.com/weathersticker/bigwx_both_cond/language/www/US/MA/Seekonk.gif" alt="Click for Seekonk, Massachusetts Forecast" border="0" height="60" width="468" />
Posted : 05/12/2013 12:06 pm
Topic starter
Here are the rest of the photos after a long delay.
Here's what the bed looked like at the start of this past summer. I had to stop work on it during the previous fall when it started to snow. You can see that some dirt and leaves ended up falling into the bed, but overall the winter was a good thing because the weight of all of the snow helped compact most of the rocks. It was at this point that I decided to reduce the size of what was going towards cacti. The lower half of the bed was just slightly too shady, so I figured that would be a good spot for other plants. You can see that I then started piling the rest of the remaining rocks on the upper half, for the best drainage: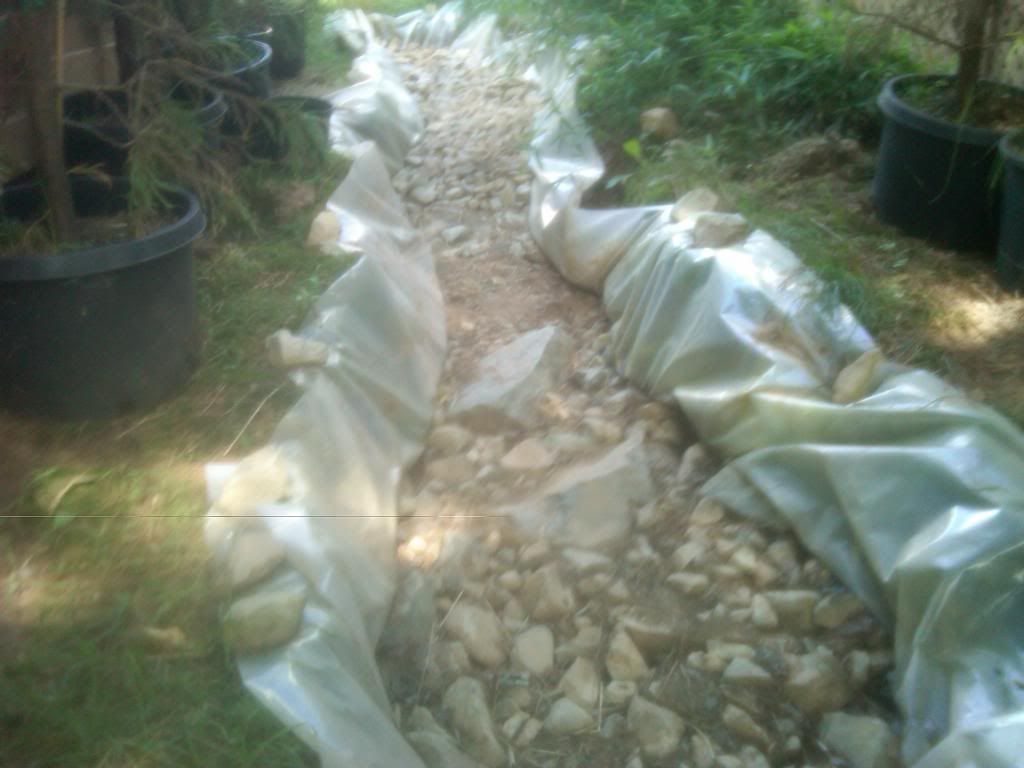
On top of those rocks, I added maybe 20-30 cm (8"-1') of pea gravel. I purchased at least 750 lbs of pea gravel, and probably 2/3 of it or more was added during this step: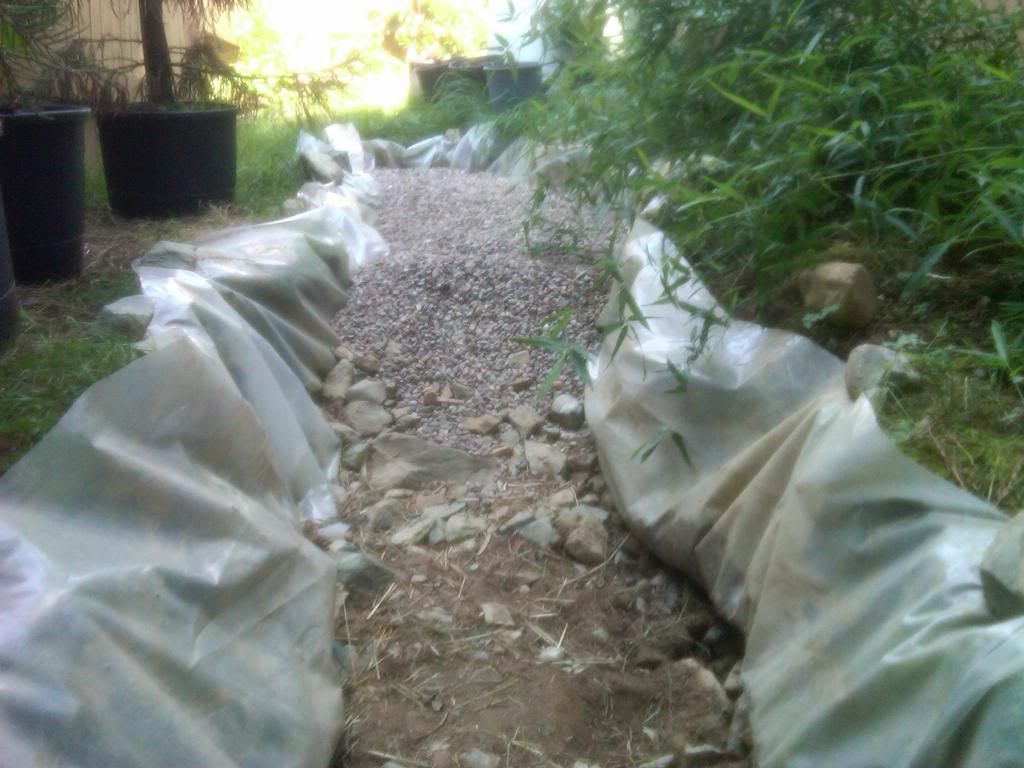
Above that pea gravel, I added around 15-20 cm (6-8") of soil. I also surrounded what was now the entire cactus bed with a border of large rocks, most of which had been pulled out of the hole as I was digging it!
<img src="http://weathersticker.wunderground.com/weathersticker/big2_both_cond/language/www/global/stations/71601.gif" alt="Click for Shearwater, Nova Scotia Forecast" border="0" height="60" width="468" />
Posted : 25/02/2014 8:44 am
Topic starter
On top of the soil, I added the remaining 15 cm or so (6") of pea gravel. It was easily contained by the surrounding border rocks, and the fact that this portion is raised above the surrounding soil will really help with drainage: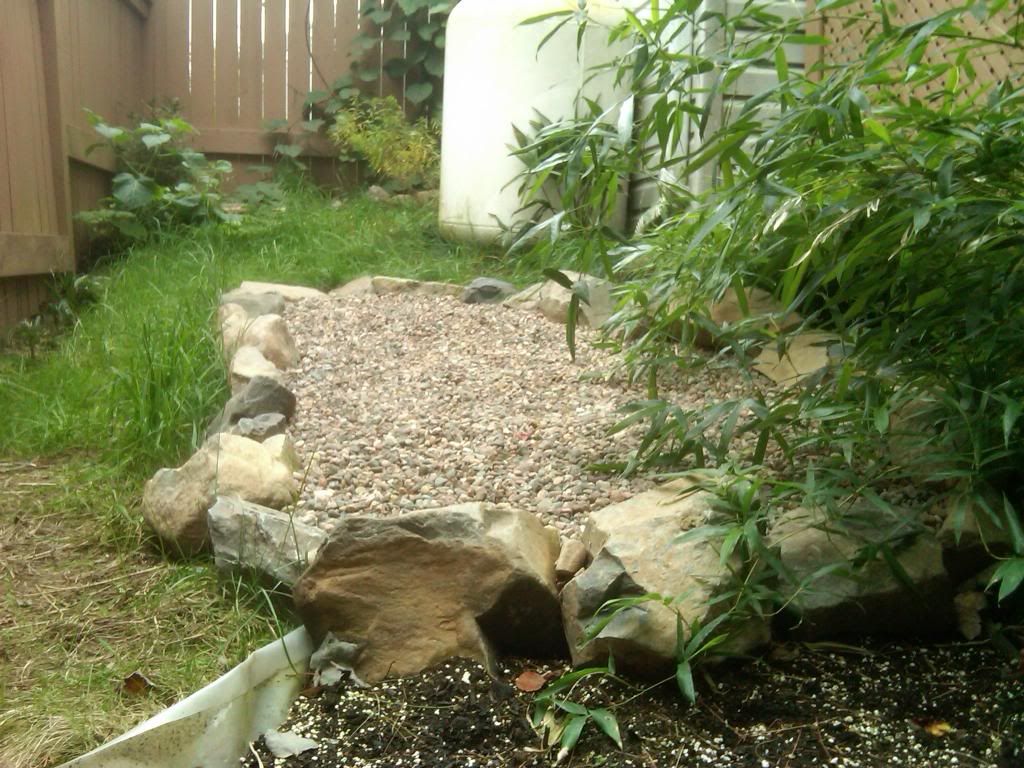
Another angle. The bamboo can easily be tied up so that it doesn't droop over the bed anymore. As well, once the culms start growing larger and straight up, they won't be affecting the amount of sun over the bed at all: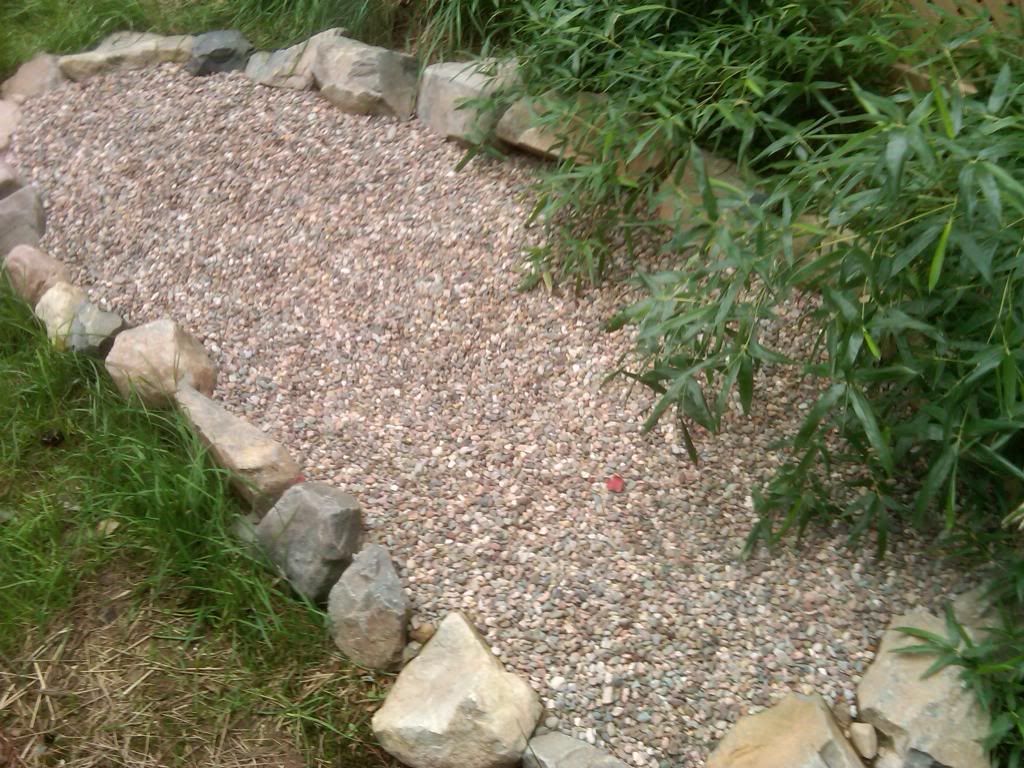
So that's the cactus bed now finished (other than adding some decorative rocks and actually planting things)! I'll post some photos of the progress on the other portion of the bed shortly.
<img src="http://weathersticker.wunderground.com/weathersticker/big2_both_cond/language/www/global/stations/71601.gif" alt="Click for Shearwater, Nova Scotia Forecast" border="0" height="60" width="468" />
Posted : 25/02/2014 9:04 am
